Overview
A Citrix Machine Catalog is a grouping of virtual machines (VMs) or physical machines that have the same operating system in Citrix Virtual Apps and Desktops (CVAD) environment. These catalogs are used to streamline the management of desktops and applications delivered through Citrix.
Creating and managing the machine catalog envolves several steps including preparing the master / golden image.
Master image.
The master image in short is a Virtual Machine containing the operating system and all applications that we can use as a template. We can utilize the Machine catalog to build multiple VMs at the same time with the same OS, application, and configuration.
Requirement prior to create master image and machine catalog.
Before creating the master image, and Citrix Machine catalog, you will need to ensure the following:
- Ensure that the hypervisor is enough resources: Processor, Memory, Disk space.
- Microsoft volume licensing activation considerations when using MCS, ensuring the machines are licensed automatically.
MCS supports volume licensing activation to automate and manage the activation of Windows operating systems and Microsoft Office. The three models that MCS supports for volume licensing activation are:
- Key Management Service (KMS).
- Active Directory-based activation (ADBA).
- Multiple Activation Key (MAK).
- You must have a DHCP server, ensuring all machines gets an IP automatically and accesible from the network once the machines are created.
Creating a master image.
- Create a VM on your Hypervisor. Specify the number of vCPUs, RAM and disk.
- Install the operating system, configure the basic setup (IP, hostname etc).
- Update all service packs and updates to the latest patches.
- Install the necessary application that will be used by the users including the standard organization application: like Antivirus, Security application, monitoring, etc.
- Install Integration tool for hypervisor (such as Citrix VM Tools, Hyper-V Integration Services, or VMware tools.)
- Join the VM to the domain.
If you are not using MCS, join the master image to the domain where applications and desktops are members. Ensure that the master image is available on the host where the machines are created. If you are using MCS, joining the master image to a domain is not required. The provisioned machines are joined to the domain specified in the catalog creation wizard.
- Install the VDA agent.
Attention:
- If you’re using MCS, do not run Sysprep on master images
- Ensure that the hard disk is attached at device location 0. Most standard master image templates configure this location by default, but some custom templates might not.
- Create a snapshot, and name it.
Citrix recommends that you create and name a snapshot of your master image so that it can be identified later. If you specify a master image rather than a snapshot when creating a catalog, the management interface creates a snapshot, but you cannot name it.
Creating Machine Catalog
- Login to Citrix server (where’s Citrix Management studio component is installed).
- Open the Citrix Management Studio app.
- Go to Machine Catalogs section.
- Choose Create Machine Catalog to launch the catalog creation wizard.
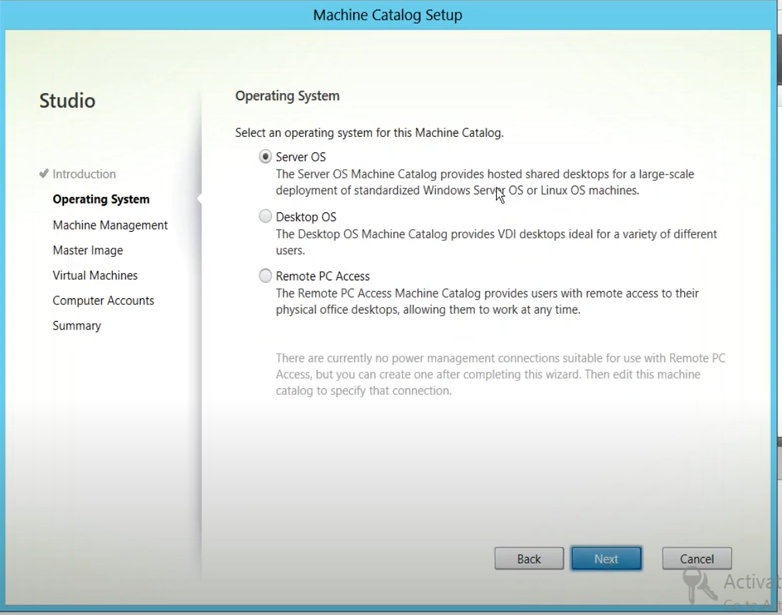
Choose Server OS, If you want to use session-based machines.
- Specify how this machine catalog will be used:
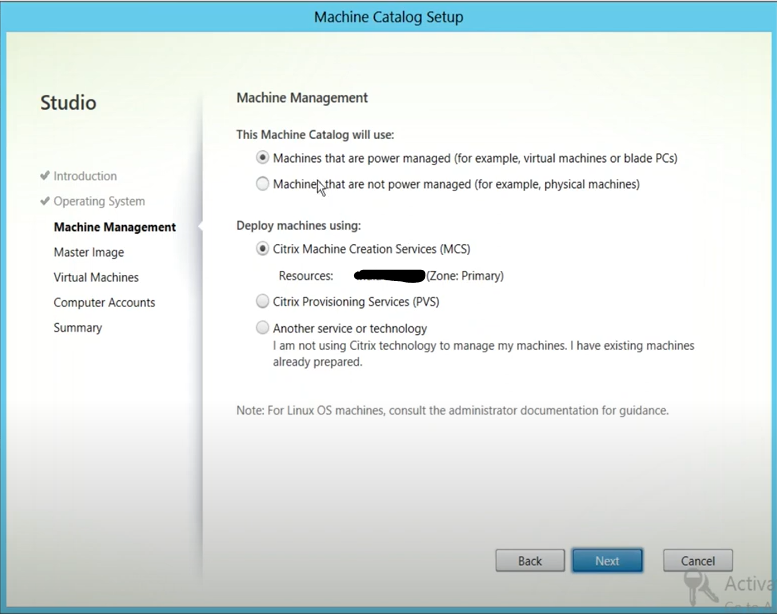
- Choose Machine that are power managed, If you want to create a session-based machine catalog.
- Choose Citrix Creation Services (MCS), if you want to create multiple VMs to a Clustered Hypervisor servers. Before using the MCS, You must create the MCS connection first to integrate the CVAD with the Hypervisor like Vcenter (ESX), SCVMM (HyperV).
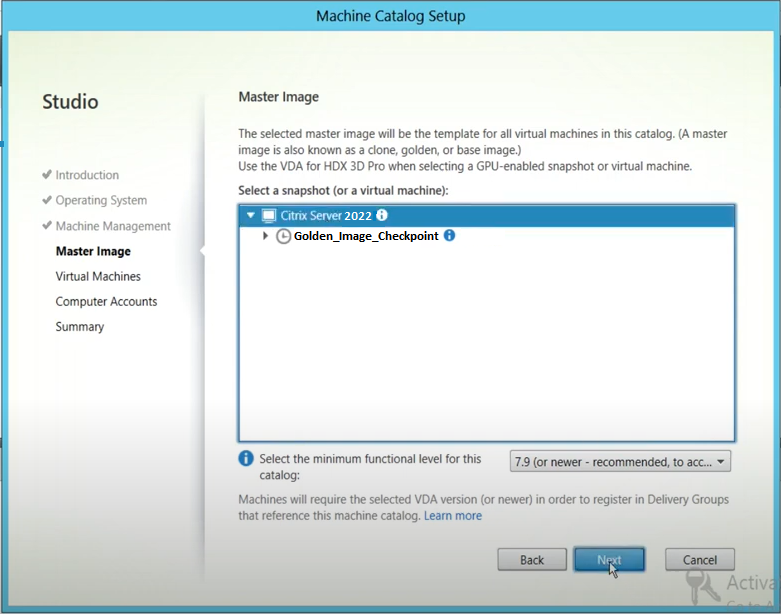
- Specify the master image.
- Choose the checkpoint of the master image (the golden image’s checkpoint), instead of directly choosing the VM image.
- Select the Functional Level.
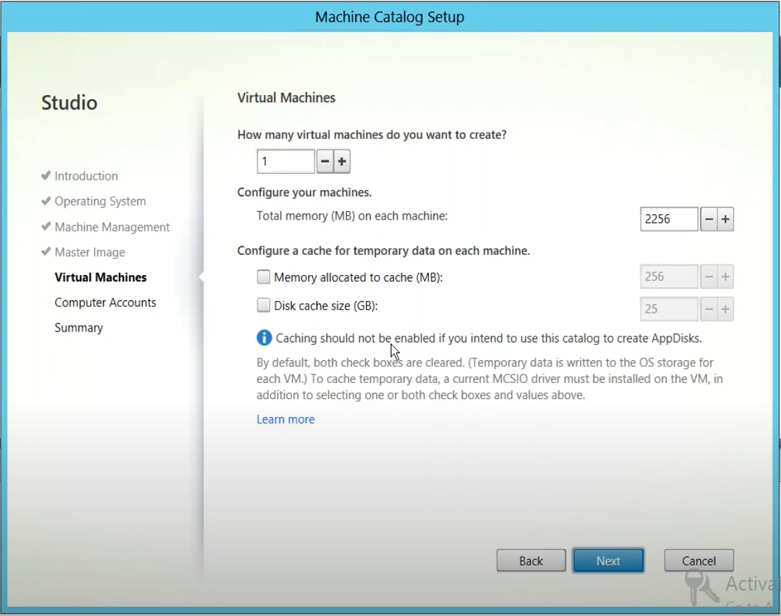
- Specify how many VM you want to create and memory you want to assign to the machine.
- Select Cache if needed (This is optional)

-
Specify where’s the OU you want to store the machine in AD.
-
Select Account Naming scheme.
-
The last one, you need to specify the machine catalog name. Enter the name and finish.
-
Once you completed the wizard. The machine creation will start. Wait a moment until the process is completed.
Updating Machines on Machine Catalog
To keep all machines in a Citrix machine catalog keep up to date, you do not need to individually update each machine, instead, you just need updating the golden image, and then applying the updated golden image to all machines through this Machine catalog. This update process involves VM deletion, and recreation. As long as the user profile including the user data is stored outside of the machines, e.g. using CPM (Citrix Profile Management) and stored into a shared folder, you shouldn’t worry about the data as after the VM recreation user will still able to access and load the data in every login.
Warning: If you are currently using a persistent Citrix machine’s model, and storing the file inside each machine locally, you will need then update each machine particularly. You can’t use this method, as this method will destroy and recreate the machine from the master image.
Here’s a general outline of the steps to update a Citrix machine catalog:
Preparation
- Create a checkpoint on the golden image before running update. Adding a suffix BeforeUpdate or something else on the checkpoint’s name to easily identify the checkpoint. This checkpoint is just a preparation step before doing any changes on the golden image.
- In any case failure after updating, we just need to roll back those machines from this checkpoint.
Updating Image
- Update the OS on the golden image to the latest patches and install.
- Install or update the application as well.
- Create secondary checkpoint. Adding a suffix
AfterUpdateon the checkpoint name to easily identify the checkpont.
This snapshot will be used as master image and can be used to update all machines on a catalog.
- Open the
Citrix Studioconsole, find the Machine catalog that you wan to update the machines, and selectUpdate Catalog.
Follow the step during the update and select the latest checkpoint
(on point 5)as a golden image.
- Keep the VM snapshot on the golden image for a few days, just a backup.
- If everything is good after this update, you can consider removing its VM snapshot.
Reverting Image Update.
If something bad happens after the update, you can still roll back the machine to previous state. The following are steps to revert back the VM to previous checkpoint:
- Go to Machine Catalog, and select Update Machine catalog.
- Select the checkpoint of the golden image to before the VM update (refer point 5, and use
AfterUpdatecheckpoint) - Push the update.
- Verify back the VM.
Avoid to use
rollback machine catalogas it will revert the VM to the original golden image, instead of previous VM checkpoint.